


This one is pretty straight-forward. Go to www.google.com/analytics and click on the top right button to login. Then, select the account/website you would like to give us access to.
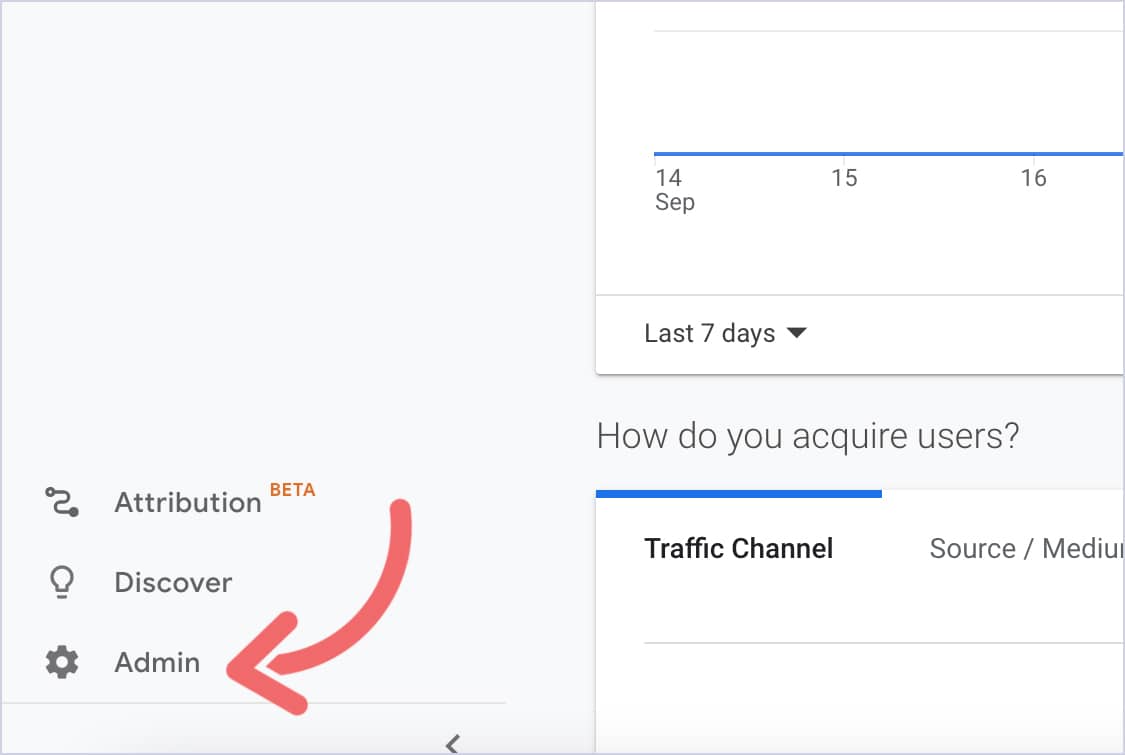
Now, click on Admin. It’s located at the bottom left of the page.
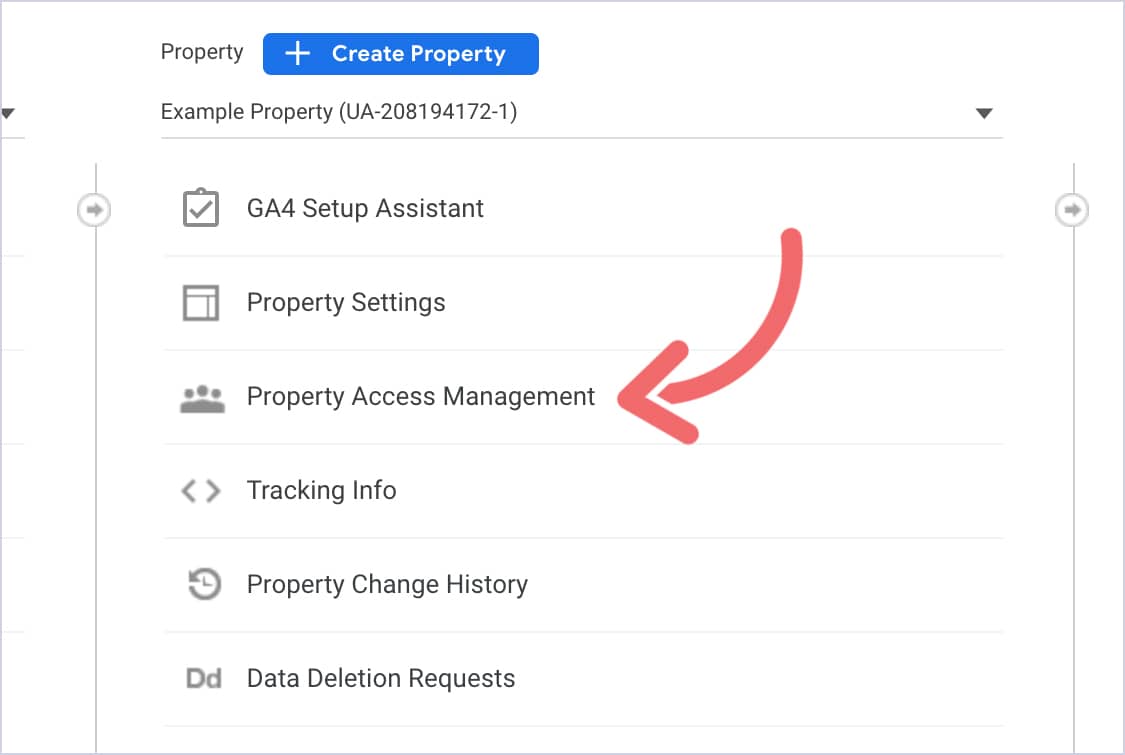
You’ll now see three columns: Account, Property, and View.
To give us access, you’ll want to click Property Access Management in the middle column.
Once the pop-up appears, click the blue plus button located on the top right.
Then, click on Add New Users from the drop-down.

Now, you’ll want to give hello@bluetuskdigital.com access.
Please do not give access to any other Blue Tusk email.
Make sure to select Notify this user by email to send us a notification.

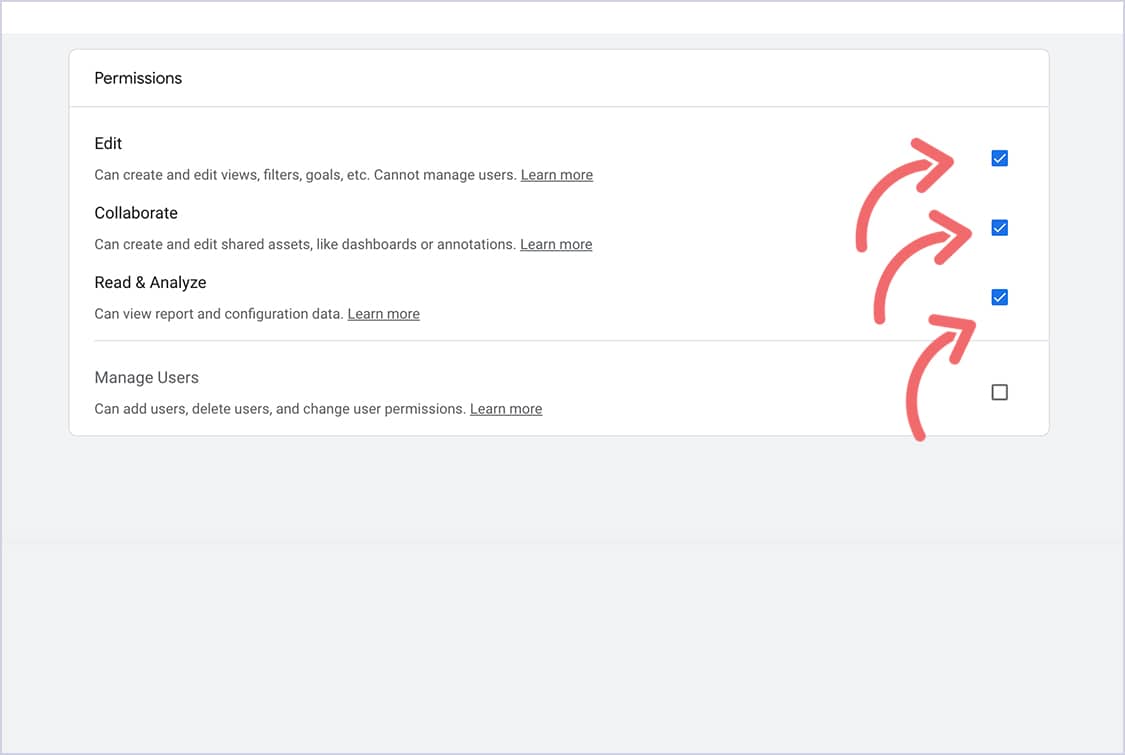
Edit, Collaborate, and Read & Analyze should also be checked.
This is crucial, so we can create goals that will be counted as conversions in your account.
Then, click Add. That’s it!
